Before you start
For the cleanest result, begin with a single DOC or DOCX manuscript. Keep the file under 50 MB, and make sure the main text is already edited. DocToPrint can help structure and format the interior, but it is not a substitute for proofreading.
If you are still preparing the manuscript itself, start with How to Format a Word Document for Book Printing. If your main concern is PDF compliance, see How to Make a PDF Print Ready.
If you are trying to make a folded booklet instead of a paperback-style interior, use how to print a Word document as a booklet.
How to print a Word document as a book with DocToPrint
1. Start a new book project
From your dashboard, create a new print formatting project. Enter the book title, subtitle if you have one, and author name exactly as you want them to appear in the project.
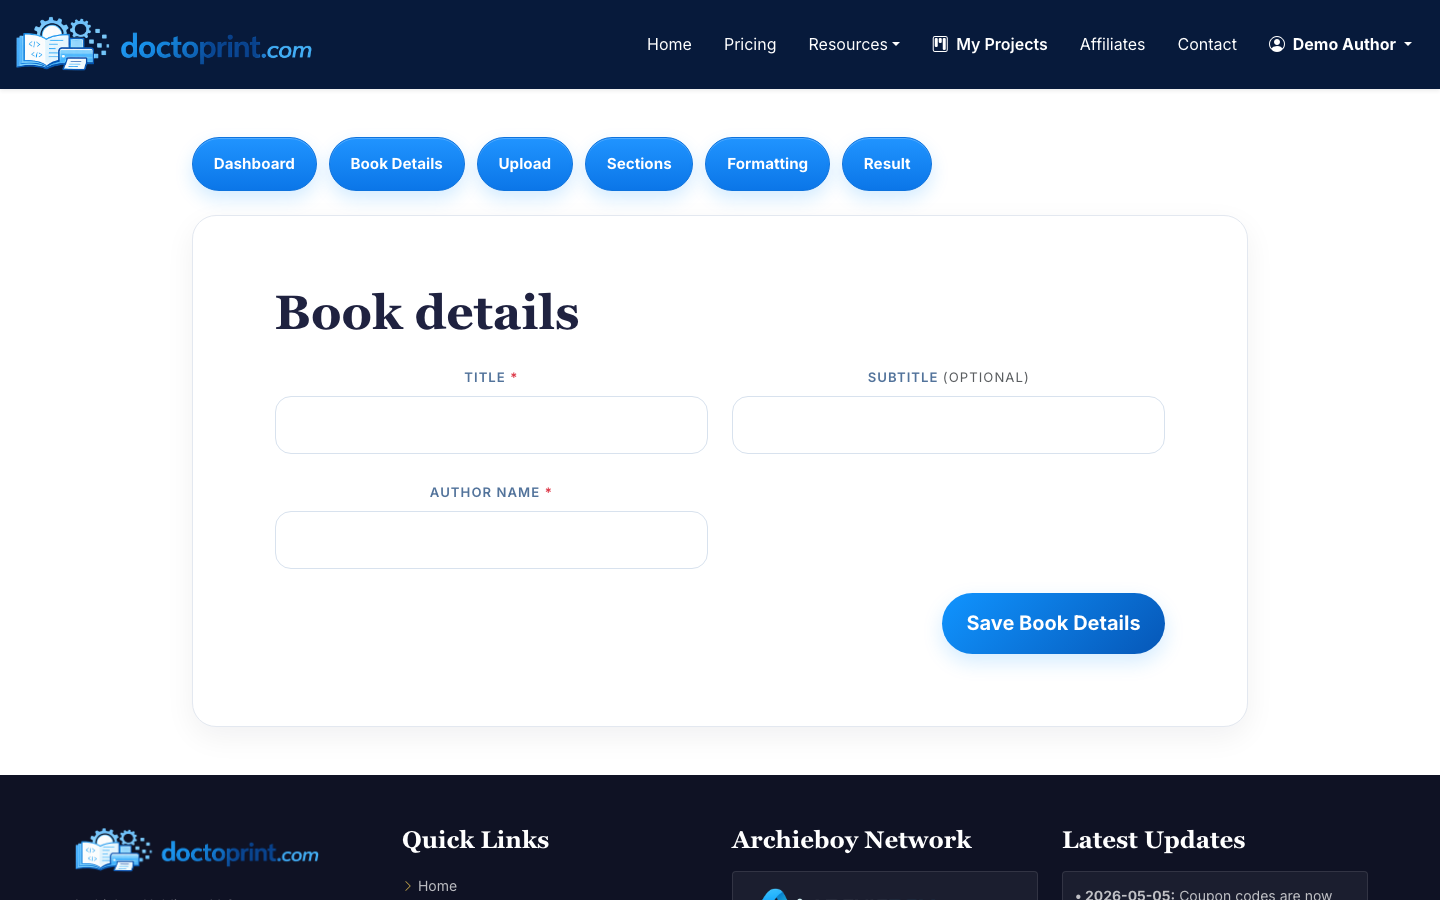
This information helps organize the project and can support the optional title page workflow later. You can still edit your manuscript content in the following steps.
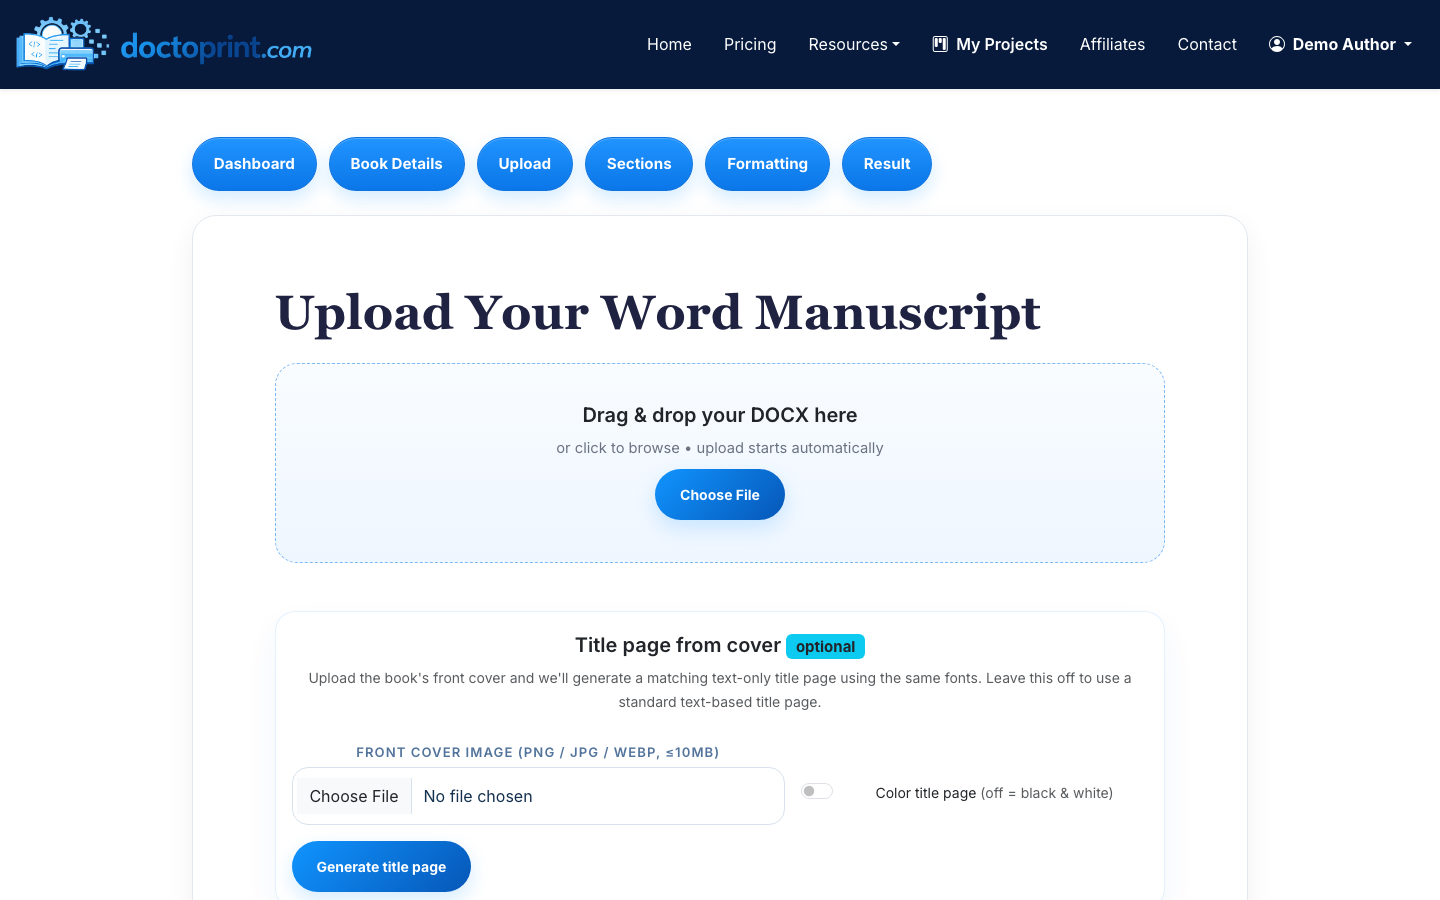
2. Upload your Word manuscript
Upload your DOC or DOCX file on the print upload screen. DocToPrint accepts Word files up to 50 MB.

This is where many authors ask how to print book format in Word. The practical answer is: Word is fine for drafting, but the final print file should usually be a PDF interior with stable pagination, embedded fonts, and printer-ready dimensions. DocToPrint converts the Word manuscript into that print-focused format.
3. Review the detected sections
After upload, DocToPrint detects chapters, front matter, and back matter. Review each section before moving on.

Check that the title page, copyright page, dedication, table of contents, chapters, acknowledgments, author bio, and other sections are labeled correctly. You can reorder sections, rename them, and edit text inline.
Pay special attention to:
- Chapter titles that were missed or merged
- Front matter accidentally treated as Chapter 1
- Blank pages copied from the Word file
- Back matter placed before the final chapter
- Short decorative headings mistaken for chapters
This step matters because book layout depends on structure. Chapter starts, page numbering, and heading styles all behave better when the manuscript sections are correctly identified.
4. Choose the book format settings
Next, choose your physical book settings: trim size, body font, heading font, paper color, chapter heading style, page number position, drop caps, chapter numbering, and whether chapters should start on the right-hand page.

Common trim sizes include 5x8, 5.5x8.5, and 6x9 for novels, memoirs, and nonfiction. The 8.5x11 option is better for workbooks, manuals, and books with large tables or worksheets.
For paper color, cream often suits novels and narrative nonfiction, while white is common for workbooks, technical books, and image-heavy interiors. Font choices affect page count: a larger or wider body font can add dozens of pages to a full-length manuscript, which may increase print cost.
5. Generate a free watermarked preview
Before spending a credit, generate the free preview and inspect it carefully. Look through the first chapter, middle chapters, section transitions, and final pages.
When reviewing the preview, check:
- Margins look balanced and do not crowd the spine
- Page numbers appear where expected
- Chapters start consistently
- Headings are not stranded at the bottom of a page
- Images, tables, and lists did not break awkwardly
- Front matter uses appropriate page numbering or no page numbers where desired
This is the closest stage to how to print a Word document like a book without committing to the final output. You are seeing the manuscript in book form, but you still have room to adjust formatting.
6. Spend one credit and download the print-ready PDF
Once the preview looks right, spend one credit to generate the clean PDF. The result page gives you a print-ready PDF download and a DOCX source download.
Use the PDF interior for KDP, IngramSpark, or a commercial printer. If you also need a matching cover or help with distribution, the result page includes one-click handoff options to BookCovers.pro and SelfPublishing.pro.
Download links auto-refresh after their 24-hour expiry, so you are not locked out of your files. Credits are sold as one-time packs, with no subscription: $19 for one, $139 for 10, or $237 for 25.
Can you do this directly in Word?
You can use Word's Page Setup, margins, section breaks, headers, footers, and Save as PDF features to create a basic book interior. That works best for short, simple books when you are comfortable managing print layout yourself.
The tradeoff is control versus time. Word gives you direct control, but it also leaves you responsible for every formatting detail: mirrored margins, gutter, page number placement, embedded fonts, blank pages, chapter starts, and PDF export settings.
DocToPrint is built for authors who want to keep writing in Word but avoid building the print interior manually. If you only need a general PDF conversion, read How to Convert DOCX to PDF for Printing. If you want a book-ready interior, use the full print formatting flow above.
Final pre-upload checklist
Before uploading your PDF to KDP, IngramSpark, or a printer, confirm these basics:
- The selected trim size matches the book setup in your printer account
- The interior PDF is the final clean version, not the watermarked preview
- Page numbers, chapter openings, and front matter look intentional
- Images and tables are readable in the final PDF
- The cover file is built for the same trim size and final page count
A Word document is a good manuscript format. A print-ready PDF is the format your book printer actually needs.
